Magpy: Getting Started
-
Install Magpy wings and Magpy propeller
-
Connect Magpy battery
-
When plane starts, you will hear a musical tone as the flight controller boots up. Listen for 3 different tone beeps which means the camera is powering on. Then, listen for 6 beeps from the camera confirming that GPS has a lock. Verify that the top external GPS receiver has both a solid green and blinking blue LED, this means the camera has power and photos will be geotagged.

-
Connect the Telemetry Radio to your android device's USB micro port using the included angled USB cable. Make sure the LED inside the radio lights up green

-
The Magpy's flight controller has a GPS lock when the distinct 3 tone sequence is heard and center flight controller LED is green.

-
Click the Mission Control icon to launch the application.
-
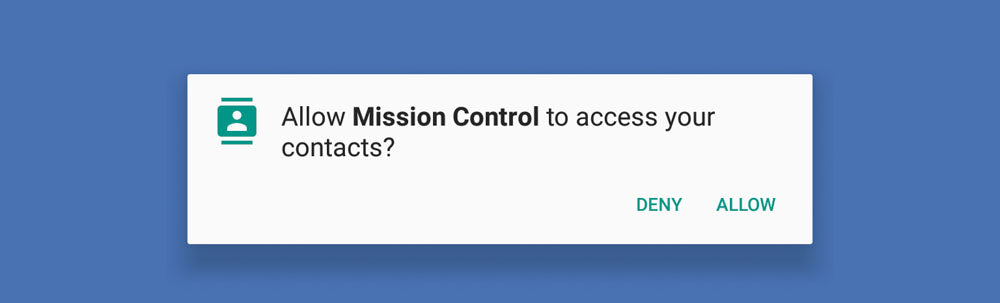
Approve 3 App Permissions.


-
Choose an account to sign in with.

-
On the vehicles page click Add Vehicle. On vehicle type choose Magpy from the drop-down, then tap Connect.

-
Allow Mission Control to use USB Device.

-
Once added to your vehicle list click Done to go to the main menu.

-
Click menu button in bottom left.

-
Click Connect To Vehicle. Vehicle should now be connected.
-
Click menu and go to Calibrate IMU and follow instructions on calibration. Calibration should be re-done whenever you travel a sizable distance from the last calibration location. When in doubt, calibrate.
-
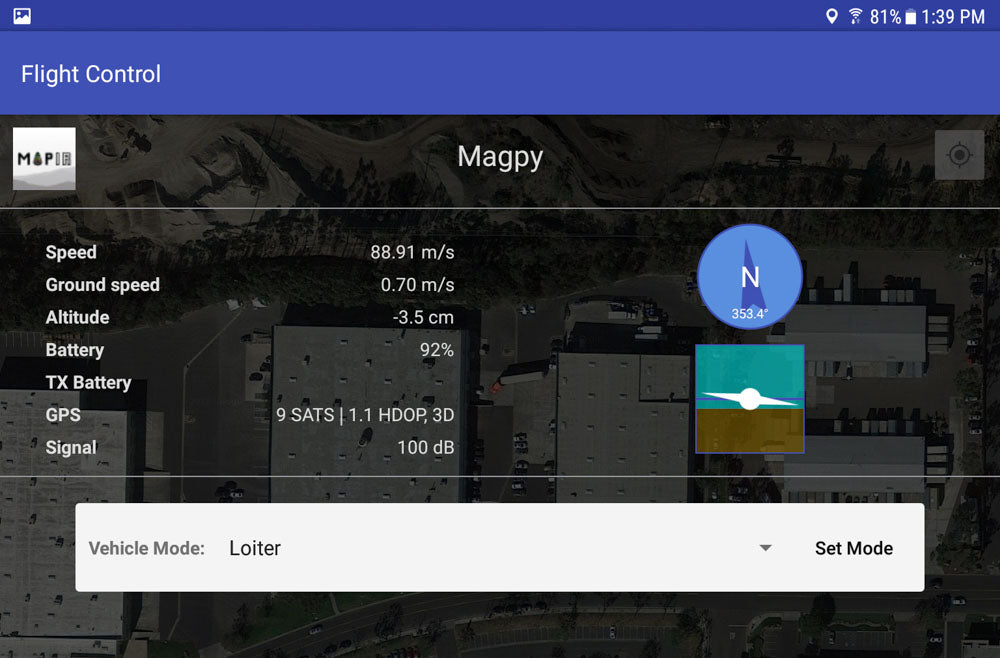
Click menu. Click Flight Control and blow steadily into Magpy’s front black nose plug to verify air-speed sensor is working.

-
Verify Speed value increases drastically (should be much larger than Ground speed when blowing into nose inlet). Tilt drone around and verify that elevation and direction icons change.
-
Tap camera icon in top right and listen for camera beep signaling that the camera is capturing a photo.


